Private Lessons in September

I am going to offer private art lessons at my home coming in the Fall.  I have had several parents ask about Summer classes and I have just not had the energy or the time to do a summer program.  Between end of the year crazy town and teaching Summer School I have been just a busy in the month of June as I was in May! 

EDIT: Have had to raise the grade level on this offer.  I have many former students upset with me for cutting it off at 4th grade, so I have decided to take students up to 6th.  This being said, I may have to split the age groups 1st - 3rd and 4th - 6th.  We will see how many I have interested...

After School Art Classes for Elementary with
Mrs. Misti Scaggs
Grades 1st - 6th
Limit 6 Students
onetime $30.00 supply fee
$30.00 per lesson
paid monthly
Classes Begin Thursday, September 6th
 from 6 pm - 7 pm
This will be a studio type class offered weekly to students interested in furthering their art education.
Misti R. Scaggs
mistiscaggs@gmail.com
*Classes will not be affiliated with PTISD or my campus art program.  Classes will be offered in my home. 


 Please let me know if you would be interested in you child attending weekly classes for extra art instruction. 
Looking forward to this new adventure for me and my students.  

2018 In the Art Room

Well, another year has flown by! I can't believe how fast it went. We had some laughs, some tears, and a whole lota fun!  Here is a little video of some of the projects we explored this year.  Towards the end of the year, as many of you know, the schedule gets tighter, faster, and more hectic.  It became increasingly harder to get pictures in this fast and furious pace.  So here is just a glimpse of our year.  


I am looking forward to next year's adventures in the art room! 

2nd Grade Clay Fish


During our 2nd Grade clay project I learned quite a bit about the amounts of clay to use and how difficult the project was for 2nd graders.  MAN was this a challenge!!!  I learned that I had not prepped enough clay per student, that the project took longer than expected time wise and would require a lot more organization and prep from me in the future.


The First day
During the first day, we watched the video by Cassie Stephens on how to make our base and our fish.  We created a large "rock" for the base with seaweed springing from the bottom and our fish.  Paying close attention to the fact that this would be a 3D sculpture, we made sure both sides of our fish were matching.  I had the classroom teacher come to the classroom about 10 minutes before pick up time to help mark the fish and the base with the student's classroom number, i.e - the student is in Mrs. Longs class, she would put L2 on the bottom of each piece belonging to that student.

The Second Day:
Students found their two pieces on a table I had set up in the hallway and place them on a paper lined blue tray donated to the art room from the science department. (BTW....I love these trays and we use them OFTEN!)  Students had Color stations of Acrylic paint to walk between to paint their fish.  I had students put their name and teacher's name on their paper before painting.  When finished, I placed the wet pieces together with their paper on my rolling wire shelves to dry.  The next week, I bagged them and sent them to their classroom to take home.

Things I learned from this lesson:

This lesson take quite a while.  I had to nick 15 extra minutes from the classroom teacher to finish the first day's lesson.  I think next time I will break it up into a 3 day lesson.  Day 1 for the base, day 2 for the fish, day 3 for painting.  Also, the hole you make for the stick to attach the two pieces together needs to be over-sized.  When the clay dries and is fired the hole draws up considerably.  I spend a lot of time shaving craft sticks with an Exacto knife so they would fit.  You can always hot glue the stick if it is too loose, but let me tell you, shaving those things is NOT fun!

First Clay Project with 1st Grade

I know it has been a while and I want to apologize!  I have been expressly busy after I returned from TAEA and it has truly been a marathon of clay projects with 1st and 2nd graders and Christmas Musical Program practices with 4th Graders!  But.....the end is near...Just 1 1/2 more days until the blessed Christmas Break commences!  YIPPPPPYYYYY

But, in the meantime, I would like to give you a little update!

First, as soon as I returned from TAEA I prepped my clay to begin Clay Birds with 1st Graders!  Thanks Cassie Stephens for a fantastic lesson!  This lesson took me 3 (45 min) class periods.

Cassie Stephens Clay Birds

Preping my clay:

I made myself a slab cutter from some scrap 2"x4" I had in the garage from a recent project (bunk beds for my son).  I used the eye hooks as a tightener and 20 gage wire.  I think in the future, I will use a more flexable wire.  This is very stiff and heard to wind and work with.

I strung a center wire to cut my slabs in half.  I cut up a cheep dollar store plastic table cloth into rectangles to place between the clay slabs and put 20 into a bag.  I did 8 bags for 12 bags to accommodate myself and about 200 students with a little extra just in case.


Day 1:  We constructed our birds.  This was a learning experience for both myself and the 1st graders.  Next time I will do a trial run with play dough before we dive into real clay.
Day 2: We used the tempera cakes to paint our birds.  This worked fine until it came time to "glaze".
Day 3:  We used Mod Podge to "glaze" our birds.  Again, this was a learning experience.  Next time I will dip the birds into a Mod Podge bath and hang dry.  Painting smeared the tempera paint and caused some birds to change colors as the tempera mixed with the Mod Podge.  OR... I may just use acrylic paint....uggghhhh....maybe not..We are talking about 1st graders!


What's Up in the Art Room


TAEA at Galveston, TX

It has been a busy few weeks for me.  I have been frantically preparing for our Texas Art Educators Association Conference in Galveston, TX.  I have been stressing, planning, planning and stressing for the past two weeks and now that it is over I can finally breath again!

The kiddo's are working on Color Theory in the Art Room and doing an amazing job.  I am excited about our new procedure that I learned at conference.  We will be reading, or rather listening to, a chapter a day from a book called "Sideways Stories from Wayside School"  by Louis Sachar.  It is silly stories that the kids are already in love with.  Hopefully, it will last us until the end of the school year.


We have a new friend I made while at Conference.  We are have name nominations this week and we will vote on his name next week.  Take a look and let me know what you think!
Name that Gnome

First Art Club Meeting!!


We have had our first Art Club meeting and it was a great success!  Thanks goes to Cassie Stephens for this amazing chalk lesson.

Although we did not use black glue as she instructed, they still turned out great!!!

We traced some hastily done fishy templates with a pencil and traced over them with a black oil pastel.  We then filled our fishies with warm chalk pastel colors.  Using the black oil pastel we divided up the background into different spaces and filled each of those in chalk pastel cool colors.  Students "massaged" the chalk into the paper with small circular motions and I love them how they turned out!

They really did an amazing job!!


Lines are EVERYWHERE!


The past two weeks we have been talking about the element of Line in all grades.  I try to keep some continuity throughout the lessons just because it makes it easier for me.  Helps me remember what we are doing, how we are doing it and saves time.  I have absolutely NO spare minutes between classes.  As one class is leaving the room, another is waiting outside the room to come in.

This lesson was a great success.  It helped review Line for my 2nd-4th Graders and introduced the vocabulary of different lines for my 1st Graders.  It also reminded my older grades how FAST Art Class really is!

I have 45 minutes to load the chairs, introduce the lesson, present the technique, pass out the paper (I don't put the paper on the table because I have some that can not resist getting started before they even know what is expected for the day!), give expectations, and our goals for the day.  I let the kids go on their own and 10 minutes before class ends I have a bell that rings to warn they have 5 minutes left to work.  A second bell rings 5 minutes after that and this is their signal to CLEAN UP!!  This gives us 5 minutes to clean up and get the classroom ready for the next class, go over our expectations of the day (did you do our standard 6 expectations which I will post about later), and reveal our Secret Student.  All before the teacher shows up to pick up his/her students.

This lesson really reminded the students that time FLIES in the art room!!

Thanks goes to Patty Palmer at Deep Space Sparkle for our lessons this week.  You will see this a lot!  I am an official Sparkler and LOVE the lessons offered to Members in the Members Club.  As soon as she offered this club I joined right away and have enjoyed AMAZING art in my room ever since.  She has so many more years experience than I and I learn something every time I do a lesson from DSS!


My First lesson was with 4th Grade.  We watched a short Youtube video on St. Basil and Ivan the Terrible and the construction of St. Basil's Cathedral.  We looked at the construction, discussed what Lines we see on the outside of the Cathedral.  
Students sketch their Cathedrals on White paper, adding pattern to show contrast, and tracing with a sharpie.


On the second day, students chose 3 chalk pastels from the same color family and starting at the top of the paper with their darkest color we discussed cross hatching the chalk and "massaging" the color into the paper.  The middle of the paper is for the medium color, and the bottom of the paper their lightest color.  They blended with small circular motions with ONE finger.  This was difficult for many students and I had lots of whole hand smearing going on!  Next they cut out their Cathedral's and glued them to the new background.  The end result is amazing!!  They look so great hanging in the hallway, however I had a lot of students not finish. They spent too much time on intricate patterns and ran out of time.  


3rd Grade looked at Line and Shape.  We drew delivery trucks using our basic shapes......rectangles, squares, circles, and triangles.  We discussed where we see delivery trucks, what are some of the things they deliver, and what would your delivery truck deliver to you.  I got everything from Toxic Gas to a Giant Bowl of Spaghetti with a Huge Meatball!  LOL!  

Students followed the same process, sketching lightly and tracing with a Sharpie.


On Day 2 they finished coloring their trucks.  It was difficult to get students to NOT add a background because it has been sung for years to FILL UP THE SPACE and do the background.  Students then got another sheet of paper and drew a scene.  Where is your delivery truck going?  They then cut out their trucks and glued them to their background.  I think they did an amazing job!  Again, many did not finish.  


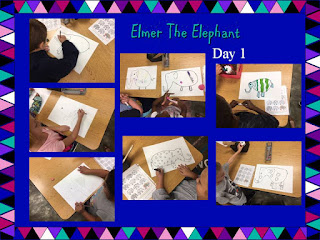
2nd Grade  read the book Elmer the Elephant by David McKee.

Students followed a Directed Line Drawing to draw their Elmer and then added whatever pattern they wanted.  They sketched with a pencil and traced with a Sharpie, finally coloring with markers. 


As you can see, it is VERY busy in the Art Room and I forgot to take pictures of the finished elephants.  I will post the finished work soon.  They really turned out great!
1st Grade learned what each line is called, how to draw them, and then took their favorite 4 for a walk across their paper.  Clifford even came by for a visit and learn about LINE!
Students then used tempera cakes to paint LOTS and LOTS of color in the different spaces their lines made.